Multiplying your favorite plants doesn’t require expensive hormones or complex laboratory setups. Growing plants from root cuttings is an incredibly rewarding way to expand your garden using natural materials you likely already have in your kitchen.
Here is your comprehensive guide to natural, homemade rooting solutions for success.
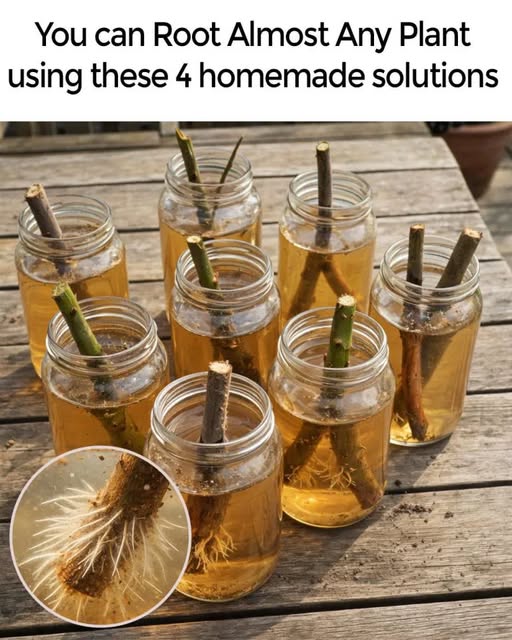
4 Natural Rooting Solutions You Can Make at Home
Using these organic boosters can help your cuttings establish strong, healthy root systems faster.
| Solution | Why it Works | How to Use |
| Honey | Natural antibacterial and antifungal properties protect the cutting from rot. | Dissolve 1 tbsp of organic honey in 2 cups of boiling water. Let cool and soak stems for 2–3 hours. |
| Aloe Vera | Contains salicylic acid and enzymes that stimulate cell growth. | Use fresh gel from a leaf. Dip the cut end directly into the gel before placing it in your growing medium. |
| Apple Cider Vinegar | Contains trace minerals that encourage rooting, though it must be used sparingly. | Mix only 1 tsp of ACV into 5–6 cups of water. Over-concentrating can kill the cutting. |
| Cinnamon | A powerful natural fungicide that prevents pathogens from attacking new roots. | Dip the damp end of your cutting into cinnamon powder before planting. |
The Step-by-Step Guide to Success
1. Timing and Selection
The best time to take root cuttings is during the plant’s dormant season (late autumn or winter). Choose parent plants that are healthy, vigorous, and free of disease.
2. Taking the Cutting
Identify the Root: Gently dig near the base of the plant to find a firm, young root.
The Cut: Use sharp, sterilized shears. Make a straight cut near the crown of the plant and a slanted cut at the far end so you know which way is “down”.
Size: Cuttings should generally be 2–4 inches long.
3. Preparation and Planting
After treating your cutting with one of the 4 homemade solutions listed above, it is time to plant:
Medium: Use a well-draining mix of sand, perlite, or light potting soil.
Orientation: Insert the cutting into the soil with the straight cut (the end formerly closest to the plant) facing upward.
Depth: The top of the cutting should be just below the soil surface.
4. Gentle Aftercare
Place your pots in a bright area but out of direct sunlight. Keep the soil consistently moist but never waterlogged. Within a few weeks to months, depending on the species, you will see new shoots emerging from the soil—a sign that your new plant has successfully “taken”.
Why Choose Root Cuttings?
Cost-Effective: You can create dozens of new plants for free.
True to Type: Unlike seeds, cuttings produce an exact genetic clone of the parent plant.
Chemical-Free: By using homemade solutions like honey or cinnamon, you keep your garden organic and safe for pollinators.
